
Connecting a local editor to a live server feels efficient. You open the project, change a file, save, and the site updates. It also removes most of the friction that protects production from a tired afternoon mistake. The goal is not to avoid remote access. It is to use it without making the live site the only copy of anything.
This guide covers a safe setup for a Hostinger account: verifying what your plan supports, connecting with SSH keys, using VS Code Remote SSH for inspection, and deploying through a reviewed commit rather than editing live files by hand.
1. Confirm what your plan actually supports
Before you install an extension or generate a key, log in to hPanel and check the features for the specific website or plan. The relevant sections are usually under Advanced or Website for SSH access, Git, cron jobs and Node.js. Availability differs between shared hosting, cloud hosting, VPS and managed WordPress.
- Is SSH enabled for this account, and what host, port and username are shown?
- Does the plan support the runtime your application needs, including the required Node.js or PHP version?
- Is there a Git deployment feature, or will you deploy with a script or CI workflow?
- What is the exact application root for this site? Do not guess.
- Can you create a staging site or a separate test environment?
- Where are backups stored, and how do you restore one?
Write the answers down. A deployment process built on assumptions about the plan is a process that fails at the worst possible moment.
Compare the limits that matter to your project
These are decision prompts, not a live plan or price comparison. Product names, resources, and included features vary; verify the current details for your region before purchasing.
One small site
A portfolio, brochure site, or first blog.
- One-site limit
- Included backups
- Domain eligibility
Business site or store
A company site with forms, products, or steady growth.
- Resource limits
- Backup frequency
- Staging and support
App or higher demand
A project with custom runtime or stronger resource needs.
- Runtime availability
- CPU and memory limits
- Scaling options
2. Use SSH keys, not passwords
Generate a dedicated key pair for the workstation. On macOS or Linux, the command is straightforward. On Windows, use the OpenSSH client that ships with modern Windows or Git Bash. Do not reuse your personal GitHub key for a hosting account if you can avoid it.
ssh-keygen -t ed25519 -C "workstation-hostinger" -f ~/.ssh/hostinger_ed25519

# Copy the public key only
cat ~/.ssh/hostinger_ed25519.pub
Add the public key in hPanel under the SSH access section for your account. Keep the private key on your machine and never paste it into a chat, a ticket, a repository or a screenshot. If the key is exposed, revoke it and generate a new pair.
3. Configure VS Code Remote - SSH
Install Microsoft's Remote - SSH extension from the VS Code marketplace. Then add a host entry to your SSH config. The values below are placeholders; copy the real host, port and username from your own hPanel.
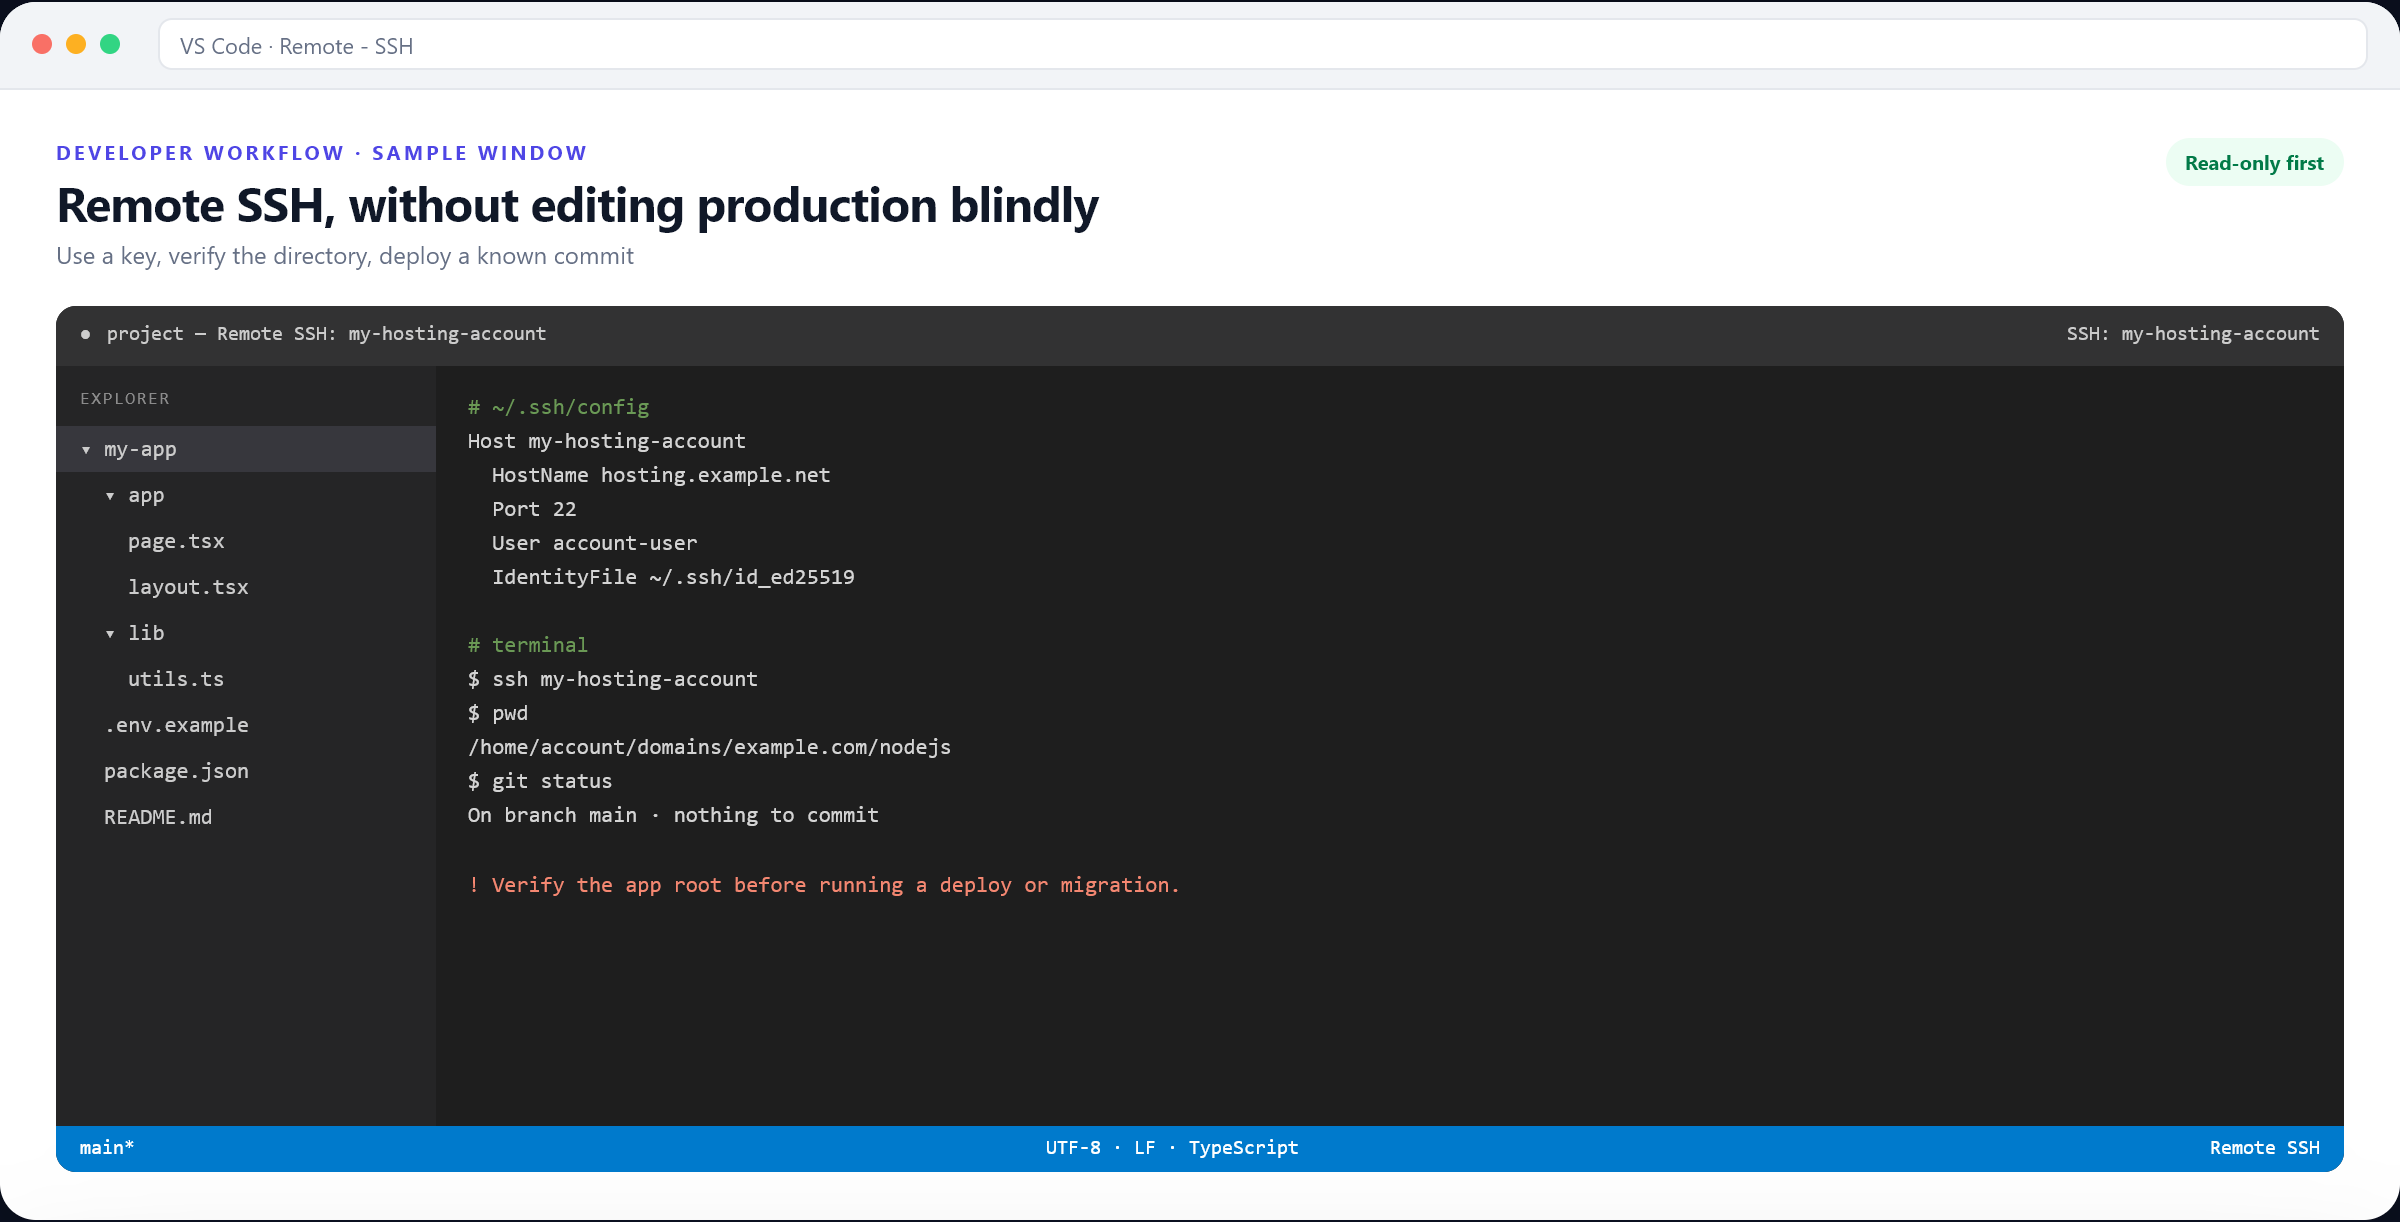
Host my-hostinger-account
    HostName hosting.example.net
    Port 65002
    User account-user
    IdentityFile ~/.ssh/hostinger_ed25519
    IdentitiesOnly yes
    ServerAliveInterval 30
The port 65002 shown above is a common example on some shared Hostinger accounts, but it is not universal. Use the port in your panel. The same applies to the hostname. If the connection fails, read the exact error before changing settings.
- 01
Connect from a terminal first
Run ssh my-hostinger-account and confirm the host key fingerprint before accepting it.
- 02
Verify the account and directory
Run whoami and pwd. Confirm you are in the intended application root, not another site on the same account.
- 03
Inspect before editing
List the files, check the runtime version and read the deployment notes. Do not open .env files in a shared screen.
- 04
Connect VS Code
Use Remote-SSH: Connect to Host and open the application folder. Keep the terminal visible.
4. Make Git the source of truth
The safest deployment is one where the live site is built from a commit you can identify. The exact mechanism depends on the plan: a provider Git integration, a CI workflow, or a script that pulls a specific branch. The principle is the same: no untracked edits on production.
- Keep the production branch protected and review changes before merging.
- Tag or record the commit that is live. “The latest main” is not a version.
- Build and test locally or in staging before deploying.
- Run database migrations as a separate, reviewed step with a backup.
- Keep environment variables in the host's environment settings, not in the repository.
- Know how to redeploy the previous known-good commit.
| Workflow | Good for | Watch out for |
|---|---|---|
| WorkflowManual SFTP upload | Good forStatic sites and emergency fixes | Watch out forEasy to upload a partial or wrong file |
| WorkflowGit pull on server | Good forSimple Node or PHP apps | Watch out forRequires SSH, build tools and a clean working tree |
| WorkflowProvider Git integration | Good forManaged deployments | Watch out forCheck branch, build command and deploy directory |
| WorkflowCI pipeline (GitHub Actions) | Good forRepeatable builds and tests | Watch out forSecrets management and runner access |
| WorkflowVS Code Remote SSH edit | Good forInspection and debugging | Watch out forNot a deployment process; changes bypass review |
5. Deploying a Node.js or Next.js app
A Node application needs more than file upload. It needs a supported runtime, a build step, environment variables, a start command and a process manager or application server. Shared hosting may support Node.js through a managed application feature, but not every framework or configuration. Verify before you build the workflow around it.
- 01
Match the runtime
Check the Node version in the panel against your package.json engines and dependencies.
- 02
Install reproducibly
Use npm ci or the equivalent lockfile command. Do not rely on a global package that happens to be installed.
- 03
Build in the right environment
Set production environment variables before the build if the framework reads them at build time.
- 04
Start the app correctly
Use the start command and port expected by the host. Confirm the application server is running, not just the build.
- 05
Check logs and health
Open the homepage, a dynamic route, the sitemap and a form. Read the runtime log for warnings.
- 06
Restart cleanly
Use the host's documented restart mechanism. Do not kill processes you do not understand.
For Next.js, confirm whether the host supports the output mode you are using. A standalone build, a static export and a server-rendered app have different requirements. If the plan only supports static files, a server-rendered app will not work no matter how the files are uploaded.
6. Environment variables and secrets
Keep production secrets in the hosting control panel or the CI provider's secret store. Use separate values for local, staging and production. Rotate any credential that has been committed, pasted into a ticket or shared in a screenshot.
- Never commit .env, .env.local or database dumps.
- Use least-privilege database users for the application.
- Restrict admin panels and SSH by IP where the host supports it.
- Enable two-factor authentication on the hosting account and the registrar.
- Keep an offline record of recovery codes.
- Remove access for former employees and agencies promptly.
7. Backups, migrations and rollback
Before a production change, take a backup you can restore. For a database-backed site, that means both the files and the database. Test the restore process on a staging copy if you have never done it. An untested backup is a hope, not a recovery plan.
- 01
Back up
Files, database and environment configuration. Store the backup outside the server.
- 02
Migrate
Run schema changes in a transaction where possible. Keep the migration idempotent.
- 03
Deploy
Deploy the known commit and run the build. Record the release.
- 04
Verify
Check the homepage, a key article, a form, the sitemap and the admin login.
- 05
Roll back if needed
Restore the previous release and database state. Do not improvise under pressure.
8. Common connection problems
| Symptom | Likely cause | What to check |
|---|---|---|
| SymptomPermission denied (publickey) | Likely causeKey not installed or wrong user | What to checkPublic key in hPanel, username, file permissions |
| SymptomConnection timed out | Likely causeWrong host or port, or network block | What to checkPanel values, firewall, VPN |
| SymptomHost key verification failed | Likely causeServer changed or wrong host | What to checkVerify with the provider; do not disable checks blindly |
| SymptomNode command not found | Likely causeRuntime not in PATH for non-interactive shell | What to checkUse the full path or the host's documented environment |
| SymptomBuild fails on server | Likely causeMissing dev dependency or memory limit | What to checkInstall with lockfile, check logs, build locally |
| SymptomApp starts then stops | Likely causeWrong start command or port | What to checkRuntime logs and host documentation |
VS Code Remote SSH is a convenience, not a substitute for a deployment process. The safest workflow is still: change locally, review the diff, test, commit, deploy the commit, verify, and keep a rollback ready. The server should be a place where code arrives, not a place where code is invented.
Need help with your setup?
Ask our team about setup support and mention code DIGIAEROTECH20. Available help and response times are confirmed case by case; no audit or service is guaranteed by this article.
If the only copy of a change is on the production server, it is not deployed. It is at risk.